Arduino IDE - first steps after installation
How to set up the Arduino IDE and update all libraries
The default settings of the Arduino IDE are not optimal and do not adhere to system defaults under GNU/Linux, for example. A few adjustments make it easier to work with the development environment.
The Arduino IDE is quickly installed and can be used even better in "portable mode". Before you start, however, some settings should be optimised.
With a few adjustments and some updates, it is much more pleasant to work with the Arduino IDE.
1. The default settings
First of all, the settings should be adjusted. The Arduino IDE (a JavaScript program, by the way) stores all settings in the file /home/<user>/.arduino15/preferences.txt. This is a bad decision by the Arduino Foundation (and many other developers), because settings of all software should be stored in ~/.config.
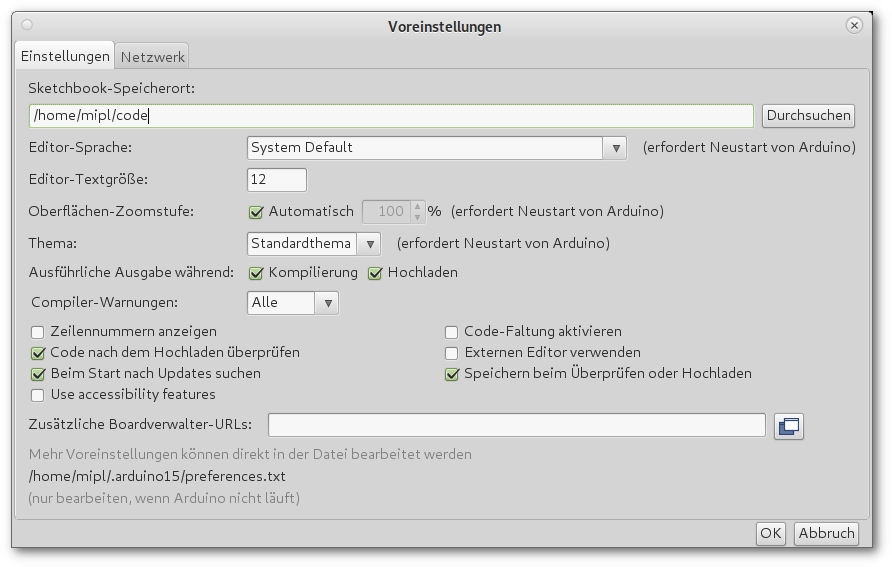
The "Sketchbook location" (in German: Quellcode-Verzeichnis für eigene Code) should not be stored in your own /home directory, but under /Dokumente (by the way, I use the directory ~/code for source code, but that is a matter of taste). For some reason this doesn't always work and you have to set the location for new projects manually...
- Sketchbook location: /home/<user>/Documents/Arduino.
When compiling source code (pardon: sketches), you should get all information from compiler, linker and programmer. For this, the options Compile and Upload must be set in "Detailed output during:".
For the Compiler Warnings, All or at least "Other should also be switched on. The other settings, such as line numbers, can be switched on if you like. A click on "OK" saves the settings.
Afterwards boards and libraries should be updated, which is inconsistent again:
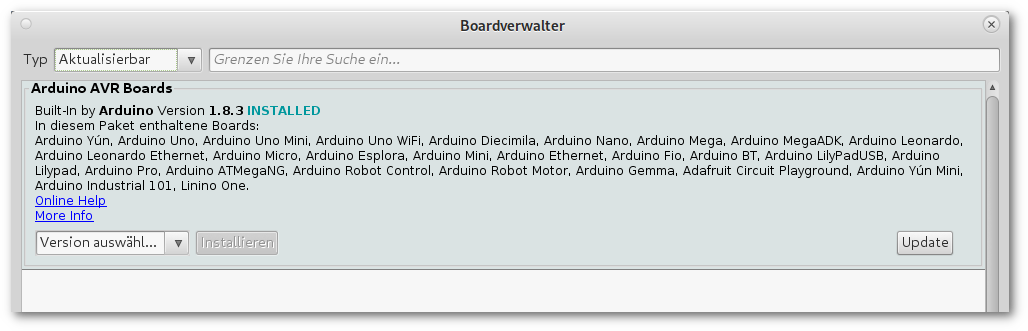
2. Update microcontroller boards
Under "Tools / Board (Arduino UNO) / Board Manager..." you will find the management for the microcontroller boards. Here you select "Updateable" at the top instead of "All" and get a list of boards that are installed and not up-to-date. Your own "Arduino AVR boards" are out of date after installation and should be brought up to date via "Update". This takes about one minute (note the progress bar at the bottom of the window!).
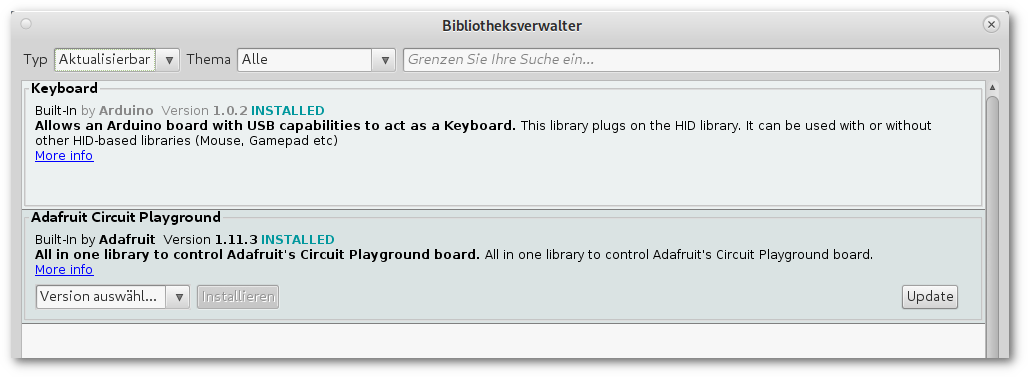
3. Update libraries
Under "Tools / Libraries..." you can switch back to "Updateable" and install newer libraries. This is especially important later, when you have added various other libraries.
Attention, you should not necessarily update the "Adafruit Circuit Playground" library, because it is normally not needed, but can lead to problems with some Duinocoin and other projects and a lot of unnecessary ballast is copied to the hard disk.
Now the Arduino IDE is ready for its first use.